Jetson Nano Dev Log
Get Started with Jetson Nano Developer Kit
Install OS to jetson Nano
as my device(jetson nano) has no sd card slot, i need to install with the SDK. Jetson as internal eMMC 16GB for installing the os VMware Fusion
1. Jetson Nano SDK manager
OS booting with Jetpack 4.x
There exist specific ubuntu version (16 or 18) to install jetpack 4.6.
And wifi ac9260 card is not suit for Jetpack 4.x.
2. VNC server setting
https://developer.nvidia.com/embedded/learn/tutorials/vnc-setup
Not similar with rasberrypi which deals vnc server with GUI.
Nvidia official provides the site to figure out vnc server setting.
3. Following “Hello AI World” course
https://github.com/dusty-nv/jetson-inference/blob/master/docs/aux-docker.md
cloning and downloading docker file
4. object detection and image classification
In Object detection, you could use temporal base column filtering in real world application.
Detection Dataset : OpenImagesDataset
5. Using Pre-defined jetson.inference package
After building the c++ and binding it with python, we can use c++ code in python function.
Which means we can inference with TensorRT optimized model computation.
So we need to make build with following guide Building the Project from Source
(samsung notebook)
1. What does build do?
내가 코드및시스템최적화 수업에서 build를 한적이 있다.
c++코드의 loop tiling, simd, urolling 등 기법을 적용하고 torch build를 했었다.
역할은 C++ 라이브러리를 컴파일하고, 컴파일된 오브젝트 파일을 TensorRT나 CUDA 라이브러리와 링크해 가속 추론이 가능한 실행 파일과 라이브러리를 생성하며, C++ 코드를 Python에서 사용할 수 있도록 바인딩 파일을 만들고, 필요한 의존성을 자동으로 점검한다.
https://github.com/jugfk/installVSCode
https://code.visualstudio.com/updates/v1_85
https://binl.tistory.com/entry/SK-Telecom-%EA%B3%B5%EC%9C%A0%EA%B8%B0-%ED%8F%AC%ED%8A%B8%ED%8F%AC%EC%9B%8C%EB%94%A9-%ED%95%98%EB%8A%94-%EB%B0%A9%EB%B2%95-2023%EB%85%84-5%EC%9B%94
할루시네이션 ufw port에 22를 넣어야하는데 서비스포트넣으라고 해서 한참 또 해멤…..
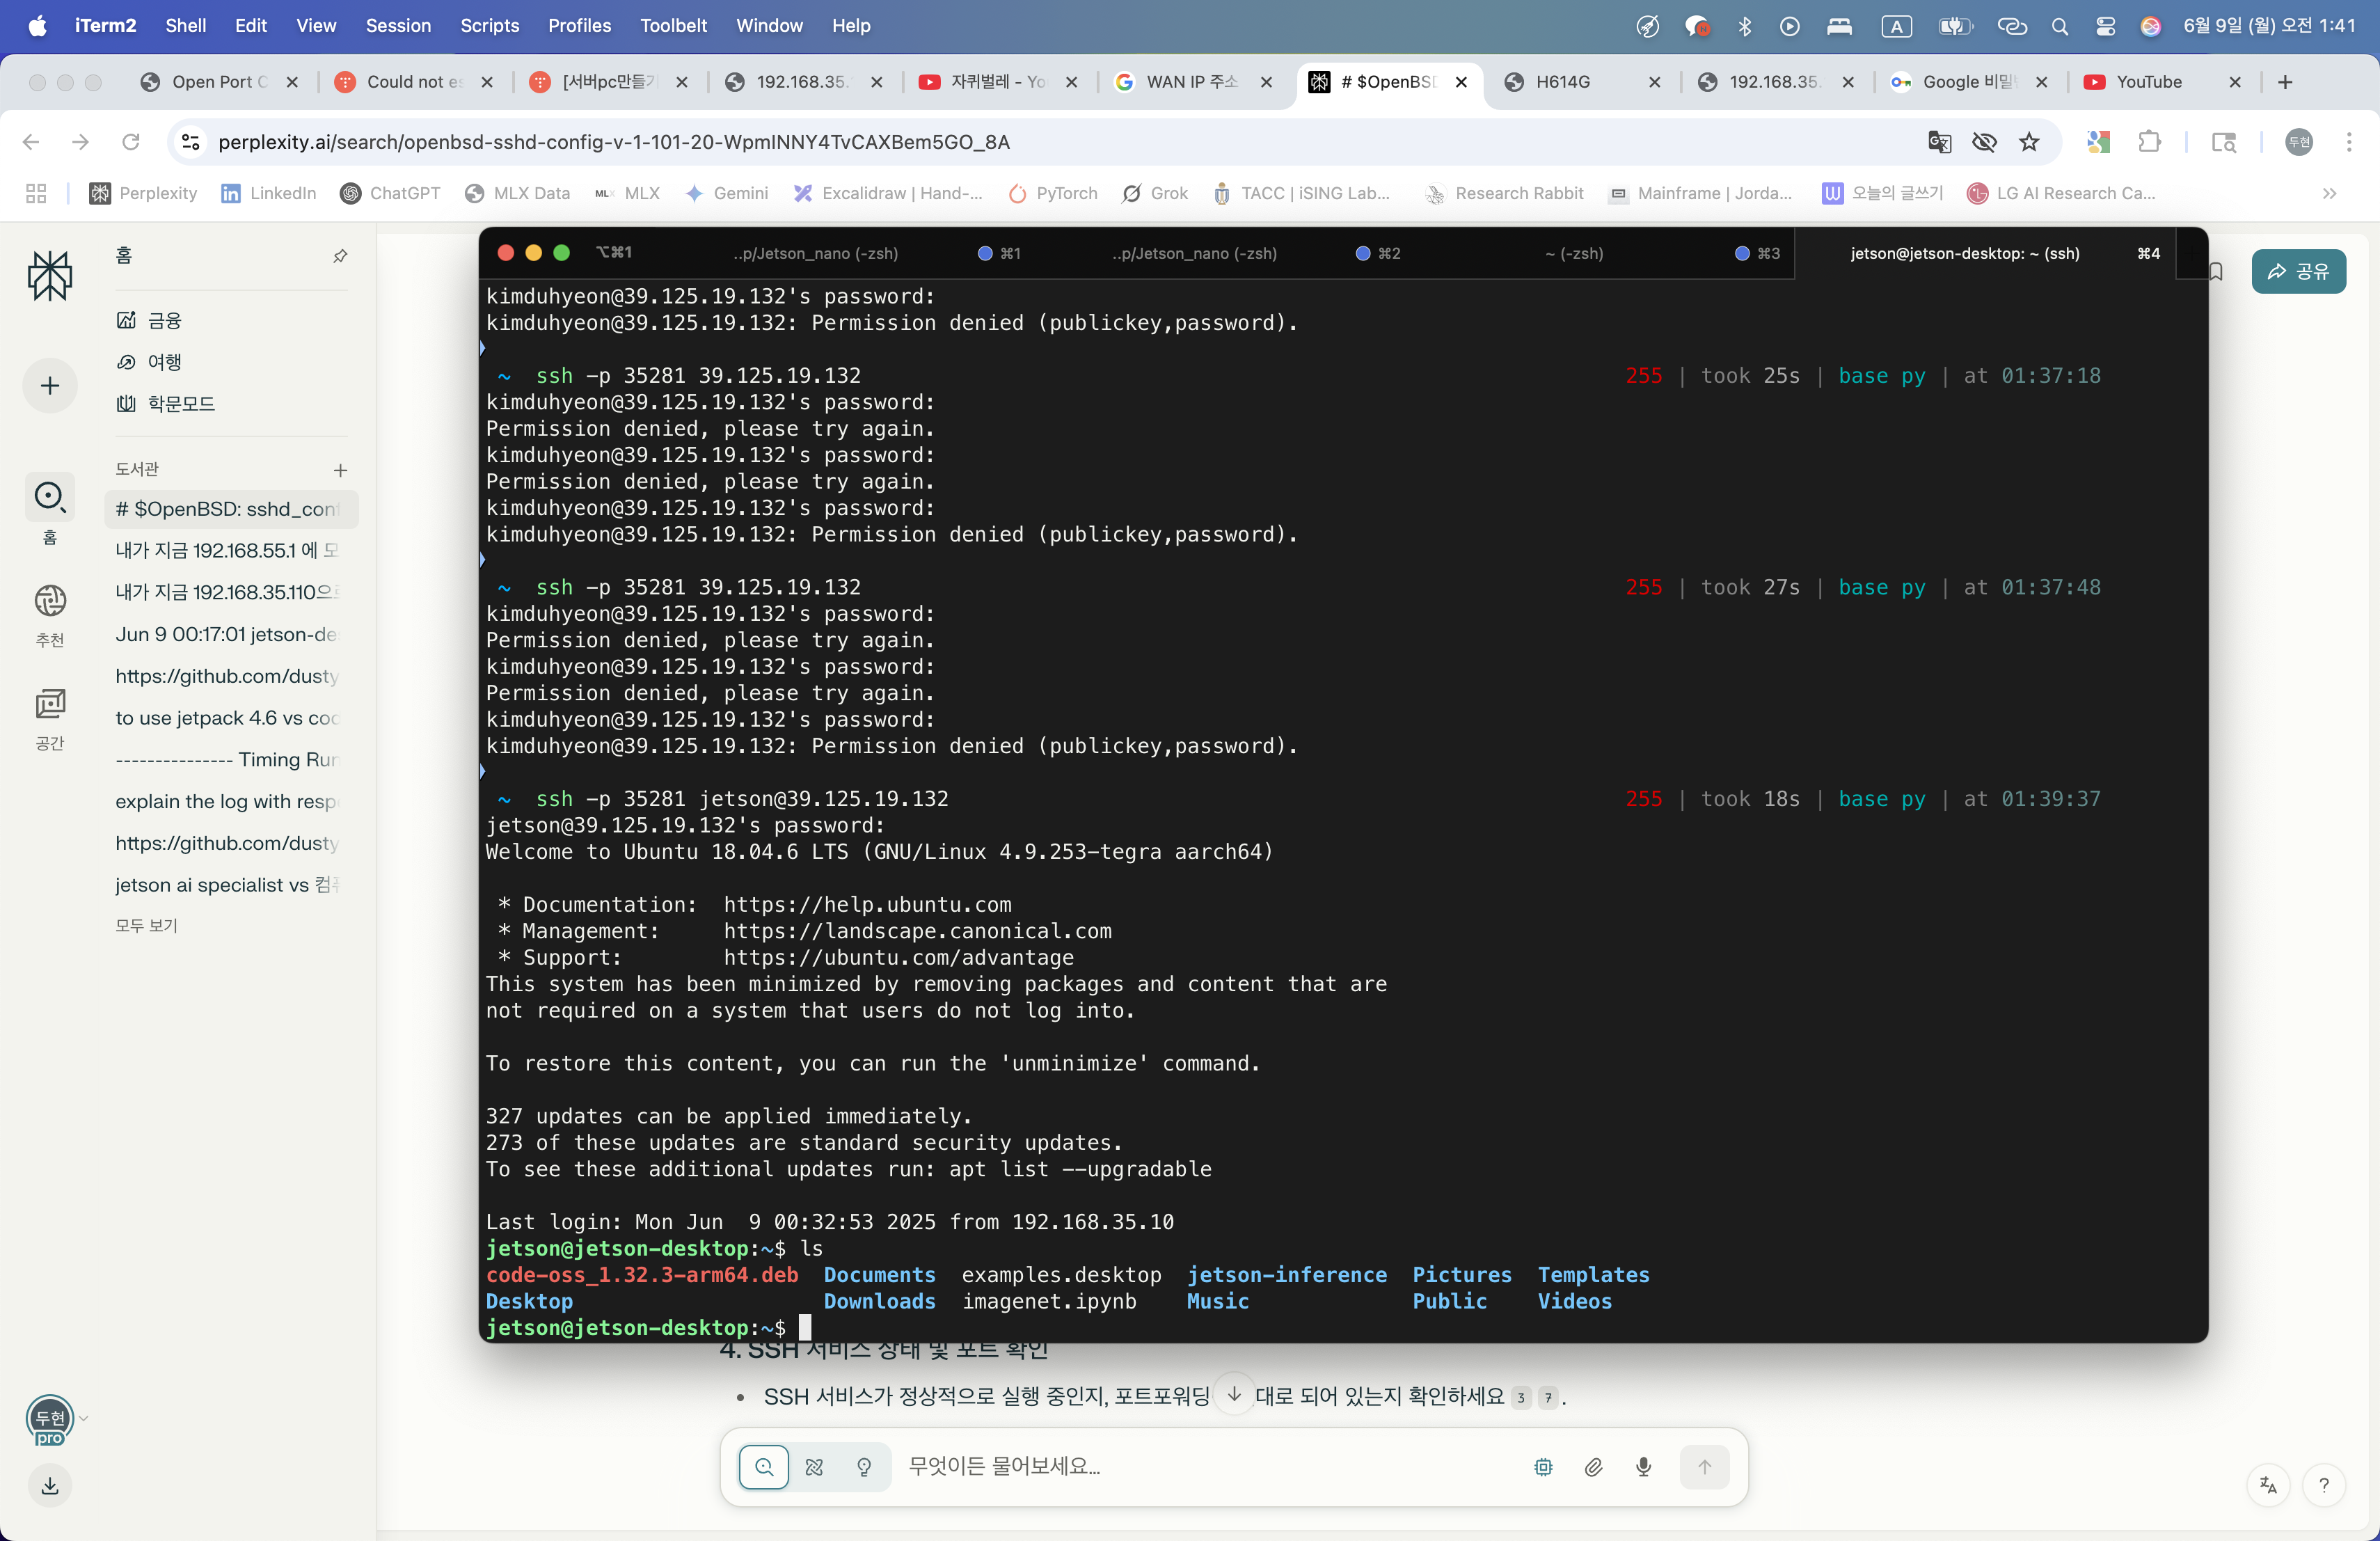
Mission CLEAR!
2. Labeling detection for 뚱땅이
My projects’ two main goal is to track 뚱땅이 loaction and sound.
Since when our family get out of home, 뚱땅이 starts to bark and it’s a now big problem for my family.
So firstly, designing the monitoring tool with jetson nano, and adding functional actinos to stabilize 뚱땅이.
Using open source tool LabelImg to annotate my own dataset.
pip3 install labelImg
labelImg
labelImg [IMAGE_PATH] [PRE-DEFINED CLASS FILE]
https://github.com/HumanSignal/awesome-data-labeling
그냥 미친앱 = https://rectlabel.com/

mac에서 제공하는 core ML 모델까지 활용해서 auto labeling을 실행함
https://developer.apple.com/machine-learning/models/
3. labeling finished
대략 1800개의 이미지를 뚱땅이에 대해서 labeling 완료함
4. model architecture change
YOLOv11n or YOLOv11s
5. ultralytics
ultralytics provides convinient tools and package to train test yolo models.
https://docs.ultralytics.com/modes/train/#resuming-interrupted-trainings
https://docs.ultralytics.com/integrations/onnx/#onnx-and-onnx-runtime
6. nvonnxparser.h 를 활용한 onnx tensorRT 변환
Working code
#include <opencv2/opencv.hpp>
#include <NvInfer.h>
#include <NvOnnxParser.h>
#include <cuda_runtime_api.h>
#include <fstream>
#include <iostream>
#include <memory>
#include <vector>
#include <algorithm>
#include <chrono>
#include <string>

using namespace nvinfer1;

// Logger for TensorRT
class Logger : public nvinfer1::ILogger {
public:
    void log(Severity severity, const char* msg) noexcept override {
        if (severity != Severity::kINFO) {
            std::cerr << msg << std::endl;
        }
    }
} gLogger;

// Save TensorRT engine to file
bool saveEngine(nvinfer1::ICudaEngine* engine, const std::string& engineFile) {
    nvinfer1::IHostMemory* serializedEngine = engine->serialize();
    if (!serializedEngine) {
        std::cerr << "Error: Failed to serialize engine." << std::endl;
        return false;
    }
    std::ofstream ofs(engineFile, std::ios::binary);
    if (!ofs) {
        std::cerr << "Error: Cannot open engine file for writing: " << engineFile << std::endl;
        delete serializedEngine;
        return false;
    }
    ofs.write(reinterpret_cast<const char*>(serializedEngine->data()), serializedEngine->size());
    ofs.close();
    delete serializedEngine;
    return true;
}

// Load TensorRT engine from file
nvinfer1::ICudaEngine* loadEngine(const std::string& engineFile, nvinfer1::ILogger& logger) {
    std::ifstream ifs(engineFile, std::ios::binary);
    if (!ifs) {
        std::cerr << "Error: Cannot open engine file for reading: " << engineFile << std::endl;
        return nullptr;
    }
    ifs.seekg(0, std::ifstream::end);
    size_t size = ifs.tellg();
    ifs.seekg(0, std::ifstream::beg);
    std::vector<char> engineData(size);
    ifs.read(engineData.data(), size);
    ifs.close();

    nvinfer1::IRuntime* runtime = nvinfer1::createInferRuntime(logger);
    nvinfer1::ICudaEngine* engine = runtime->deserializeCudaEngine(engineData.data(), size, nullptr);
    delete runtime;
    return engine;
}

// Build TensorRT engine from ONNX
ICudaEngine* buildEngine(const std::string& onnxFile, int maxBatchSize) {
    IBuilder* builder = createInferBuilder(gLogger);
    const auto explicitBatch = 1U << static_cast<uint32_t>(NetworkDefinitionCreationFlag::kEXPLICIT_BATCH);
    INetworkDefinition* network = builder->createNetworkV2(explicitBatch);
    nvonnxparser::IParser* parser = nvonnxparser::createParser(*network, gLogger);

    std::ifstream file(onnxFile, std::ios::binary);
    if (!file.good()) {
        std::cerr << "Error: Cannot open ONNX file: " << onnxFile << std::endl;
        return nullptr;
    }
    file.seekg(0, file.end);
    size_t size = file.tellg();
    file.seekg(0, file.beg);
    std::vector<char> modelData(size);
    file.read(modelData.data(), size);
    file.close();

    if (!parser->parse(modelData.data(), size)) {
        std::cerr << "Error: Failed to parse ONNX model" << std::endl;
        return nullptr;
    }

    IBuilderConfig* config = builder->createBuilderConfig();
    config->setMaxWorkspaceSize(1ULL << 30); // 1GB
    if (builder->platformHasFastFp16()) {
        config->setFlag(nvinfer1::BuilderFlag::kFP16);
    }
    builder->setMaxBatchSize(maxBatchSize);
    ICudaEngine* engine = builder->buildEngineWithConfig(*network, *config);

    delete parser;
    delete network;
    delete config;
    delete builder;

    return engine;
}

// Bounding box structure
struct BBox {
    float x1, y1, x2, y2, score;
    int classId;
};

// Non-Maximum Suppression
std::vector<BBox> nms(const std::vector<BBox>& boxes, float iouThreshold, float scoreThreshold) {
    std::vector<BBox> filteredBoxes;
    std::vector<BBox> sortedBoxes = boxes;
    std::sort(sortedBoxes.begin(), sortedBoxes.end(), [](const BBox& a, const BBox& b) {
        return a.score > b.score;
    });

    while (!sortedBoxes.empty()) {
        BBox best = sortedBoxes.front();
        if (best.score >= scoreThreshold) {
            filteredBoxes.push_back(best);
        }
        sortedBoxes.erase(sortedBoxes.begin());
        sortedBoxes.erase(std::remove_if(sortedBoxes.begin(), sortedBoxes.end(), [&](const BBox& b) {
            float x1 = std::max(best.x1, b.x1);
            float y1 = std::max(best.y1, b.y1);
            float x2 = std::min(best.x2, b.x2);
            float y2 = std::min(best.y2, b.y2);
            float w = std::max(0.0f, x2 - x1);
            float h = std::max(0.0f, y2 - y1);
            float inter = w * h;
            float area1 = (best.x2 - best.x1) * (best.y2 - best.y1);
            float area2 = (b.x2 - b.x1) * (b.y2 - b.y1);
            float iou = inter / (area1 + area2 - inter);
            return iou > iouThreshold;
        }), sortedBoxes.end());
    }
    return filteredBoxes;
}

// Inference with CUDA buffers
void doInference(IExecutionContext* context, float* input, float* output, int batchSize, int inputSize, int outputSize, void** buffers) {
    auto start = std::chrono::high_resolution_clock::now();
    cudaMemcpy(buffers[0], input, batchSize * inputSize * sizeof(float), cudaMemcpyHostToDevice);
    auto memcpy_h2d_end = std::chrono::high_resolution_clock::now();
    context->executeV2(buffers);
    auto inference_end = std::chrono::high_resolution_clock::now();
    cudaMemcpy(output, buffers[1], batchSize * outputSize * sizeof(float), cudaMemcpyDeviceToHost);
    auto memcpy_d2h_end = std::chrono::high_resolution_clock::now();
    auto h2d_time = std::chrono::duration<double>(memcpy_h2d_end - start).count() * 1000;
    auto inference_time = std::chrono::duration<double>(inference_end - memcpy_h2d_end).count() * 1000;
    auto d2h_time = std::chrono::duration<double>(memcpy_d2h_end - inference_end).count() * 1000;
    std::cout << "[Inference Timing] H2D: " << h2d_time << "ms, Inference: " << inference_time << "ms, D2H: " << d2h_time << "ms" << std::endl;
}

// Preprocess input image for YOLO (resize, BGR->RGB, normalize, CHW)
void preprocessImage(const cv::Mat& img, float* input, int width, int height) {
    cv::Mat resized, rgb;
    cv::resize(img, resized, cv::Size(width, height));
    cv::cvtColor(resized, rgb, cv::COLOR_BGR2RGB);
    cv::Mat floatImg;
    rgb.convertTo(floatImg, CV_32FC3, 1.0 / 255.0);
    std::vector<cv::Mat> channels(3);
    cv::split(floatImg, channels);
    int index = 0;
    for (int c = 0; c < 3; ++c) {
        for (int h = 0; h < height; ++h) {
            for (int w = 0; w < width; ++w) {
                input[index++] = channels[c].at<float>(h, w);
            }
        }
    }
}

// Post-process YOLO output
std::vector<BBox> postProcess(float* output, int numBoxes, float confThreshold, int origWidth, int origHeight, int modelWidth, int modelHeight) {
    std::vector<BBox> boxes;
    float scaleX = (float)origWidth / (float)modelWidth;
    float scaleY = (float)origHeight / (float)modelHeight;
    for (int i = 0; i < numBoxes; ++i) {
        float x_center = output[0 * numBoxes + i];
        float y_center = output[1 * numBoxes + i];
        float w = output[2 * numBoxes + i];
        float h = output[3 * numBoxes + i];
        float conf = output[4 * numBoxes + i];
        if (conf < confThreshold) continue;
        float x1 = (x_center - w / 2.0f) * scaleX;
        float y1 = (y_center - h / 2.0f) * scaleY;
        float x2 = (x_center + w / 2.0f) * scaleX;
        float y2 = (y_center + h / 2.0f) * scaleY;
        x1 = std::max(0.0f, std::min(x1, (float)origWidth - 1));
        y1 = std::max(0.0f, std::min(y1, (float)origHeight - 1));
        x2 = std::max(0.0f, std::min(x2, (float)origWidth - 1));
        y2 = std::max(0.0f, std::min(y2, (float)origHeight - 1));
        boxes.push_back({x1, y1, x2, y2, conf, 0});
    }
    return nms(boxes, 0.45f, confThreshold);
}

int main(int argc, char** argv) {
    if (argc != 3) {
        std::cerr << "Usage: " << argv[0] << " <onnx_model_path> <video_path or camera>" << std::endl;
        std::cerr << "Example for camera: " << argv[0] << " best.onnx /dev/video0" << std::endl;
        std::cerr << "Example for camera: " << argv[0] << " best.onnx 0" << std::endl;
        std::cerr << "Example for video:  " << argv[0] << " best.onnx sample.mp4" << std::endl;
        return -1;
    }

    std::string onnxFile = argv[1];
    std::string videoPath = argv[2];
    std::string engineFile = onnxFile + ".engine";

    nvinfer1::ICudaEngine* engine = nullptr;
    std::ifstream f(engineFile);
    if (f.good()) {
        std::cout << "Loading cached TensorRT engine from " << engineFile << std::endl;
        engine = loadEngine(engineFile, gLogger);
    } else {
        std::cout << "Building TensorRT engine from ONNX and caching to " << engineFile << std::endl;
        engine = buildEngine(onnxFile, 1);
        if (engine) saveEngine(engine, engineFile);
    }
    if (!engine) {
        std::cerr << "Failed to load or build TensorRT engine" << std::endl;
        return -1;
    }

    IExecutionContext* context = engine->createExecutionContext();
    if (!context) {
        std::cerr << "Failed to create execution context" << std::endl;
        delete engine;
        return -1;
    }

    int inputIdx = engine->getBindingIndex("images");
    int outputIdx = engine->getBindingIndex("output0");
    if (inputIdx == -1 || outputIdx == -1) {
        std::cerr << "Error: Could not find input/output bindings. Check tensor names." << std::endl;
        for (int i = 0; i < engine->getNbBindings(); ++i) {
            std::cout << "  [" << i << "] " << engine->getBindingName(i) << std::endl;
        }
        delete context;
        delete engine;
        return -1;
    }
    Dims inputDims = engine->getBindingDimensions(inputIdx);
    Dims outputDims = engine->getBindingDimensions(outputIdx);

    int inputSize = inputDims.d[1] * inputDims.d[2] * inputDims.d[3];
    int numBoxes = outputDims.d[2];
    int outputSize = outputDims.d[1] * outputDims.d[2];
    int width = inputDims.d[3];
    int height = inputDims.d[2];

    std::cout << "[Buffer Info] Input size: " << inputSize << ", Output size: " << outputSize << ", Num boxes: " << numBoxes << std::endl;

    void* buffers[2];
    cudaMalloc(&buffers[0], inputSize * sizeof(float));
    cudaMalloc(&buffers[1], outputSize * sizeof(float));

    // VideoCapture: support for file, /dev/video*, or camera index
    cv::VideoCapture cap;
    if (videoPath == "0") {
        cap.open(0);
    } else if (videoPath.find("/dev/video") == 0) {
        cap.open(videoPath, cv::CAP_V4L2);
    } else {
        cap.open(videoPath);
    }
    if (!cap.isOpened()) {
        std::cerr << "Error: Cannot open video or camera: " << videoPath << std::endl;
        delete context;
        delete engine;
        cudaFree(buffers[0]);
        cudaFree(buffers[1]);
        return -1;
    }

    cv::namedWindow("YOLOv11n Inference", cv::WINDOW_NORMAL);
    cv::resizeWindow("YOLOv11n Inference", 960, 540);

    std::vector<float> input(inputSize);
    std::vector<float> output(outputSize);

    cv::Mat frame;
    while (cap.read(frame)) {
        preprocessImage(frame, input.data(), width, height);
        doInference(context, input.data(), output.data(), 1, inputSize, outputSize, buffers);
        std::vector<BBox> boxes = postProcess(output.data(), numBoxes, 0.3f, frame.cols, frame.rows, width, height);

        for (const auto& box : boxes) {
            cv::rectangle(frame, cv::Point((int)box.x1, (int)box.y1), cv::Point((int)box.x2, (int)box.y2), cv::Scalar(0, 255, 0), 2);
            std::string label = "Object: " + std::to_string(box.score).substr(0, 4);
            cv::putText(frame, label, cv::Point((int)box.x1, (int)box.y1 - 10), cv::FONT_HERSHEY_SIMPLEX, 0.5, cv::Scalar(0, 255, 0), 2);
        }

        cv::imshow("YOLOv11n Inference", frame);
        if (cv::waitKey(1) == 27) break; // ESC to exit
    }

    cap.release();
    cv::destroyAllWindows();
    delete context;
    delete engine;
    cudaFree(buffers[0]);
    cudaFree(buffers[1]);
    return 0;
}
Let’s deeal with GPIO
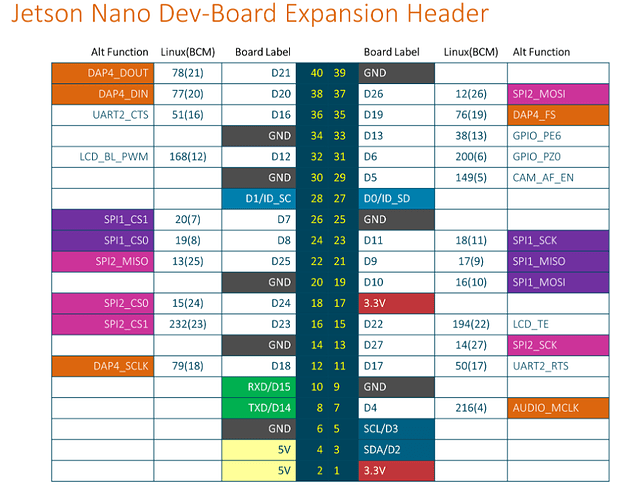
servo Motor Operation
using drvier -> SCL, SDL should be used
SCL : clock to send data to Driver
SDL : data for address and data
sudo /opt/nvidia/jetson-io/jetson-io.py -> 여기서 32 33 pwm check
https://github.com/Rubberazer/JETGPIO?tab=readme-ov-file https://github.com/pjueon/JetsonGPIO
지금 servo motor driver가 없기 때문에 gpio 33, 32로 직접 조절한다.
http://www.ee.ic.ac.uk/pcheung/teaching/DE1_EE/stores/sg90_datasheet.pdf
pwm으로 해당 모터가 위치할 각도를 제공한다. (서보모터 잘 골라야됨)
fps를 높여서 잔상을 줄이겟다는 접근 (30 -> 120fps 1280x720 Gstreamer를 이용할때, 그냥 라파에서 사용하면 200fps까지 가능하다고 함)
Other Nets
Faster-R-CNN -> 안해봐도 heavy
ssd training
ssd는 또 voc를 활용함 -> converting하고,
기존 jetson inference에서 제공하는 pytorch-ssd가 background 이미지에 대한 bbox을 아애 인식을 안하고 ignore해서 뜯어봐야함
역시 모델 분석을 통해서 regression hear가 필요한가? 그냥 bbox 좌표를 예측하는게 낫지 않은가를 알 수 있었음 (anchor free detection)
- CenterNet
- FCOS
- YOLO-NAS
PTZ control input?
COCO + ttung_dataset 에 이어서 새로운 데이터셋 https://docs.ultralytics.com/datasets/pose/dog-pose/
- Tisnghu dog dataset Link
- Standford Dataset Link
- Ttung_dataset (My custom dataset approx. 1700)
- COCO2017 (dog class + 25000 background) Link
-> 대략 12만개 데이터
CenterNet mb2
mb2는 inverted residual사용
- 무조건 3x3이고 stride=2를 repeated inverted residual block 첫번째에만 적용함
- 이때 inverted residual conv는 depthwise와 point-wise conv로 연산량은 줄이고, channel은 맞춤
mb2의 feature를 sequential로 구분해서 연결해서 4개의 feature을 extract하고, IDAUP으로 out_dim=24로 fushing한다. 거기서 그리고 1x1 conv로 keypoint heatmap(channel=num_classes) / offset (2,h,w) / size (2,h,w)
GPIO memory mapping
https://ibin-study.github.io/posts/Jetson_pwm_enable/
이 사이트에서
### Enable Pin 32 / PWM0
$ sudo busybox devmem 0x700031fc 32 0x45
$ sudo busybox devmem 0x6000d504 32 0x2

### Enable Pin 33/ PWM2
$ sudo busybox devmem 0x70003248 32 0x46
$ sudo busybox devmem 0x6000d100 32 0x00
이거를 해야된다
Jetson Arduino Serial UART
pip install pyserial 로 해야됨
# 시리얼 콘솔 비활성화
sudo systemctl stop nvgetty
sudo systemctl disable nvgetty

# 포트 권한 설정
sudo chmod 666 /dev/ttyTHS1
이거를 해야된다는데
일단 c++기반 보다 python 기반이 더 빠름 (c++ 엔진)
usb로 하는걸로 tx rx는 jetson gpio 특성상 맛간거 같음ㅇㅇ
AMP scaler 저장안해서 train continue가 overflow함
다시 코드 작성해서 scratch 부터 트레이닝, checkpoint 저장잘하면서도
https://github.com/d-li14/mobilenetv2.pytorch
참고해서 mobilenet v2 multi=0.5 의 dataloader transform을 맞춰서 수정
Transform에서의 불일치 발생
-> vibe coding의 문제 -> 무조건 코드 검토는 필수
image를 resizing하고 randomfilp하는 과정에서 bbox의 정보가 바꾸지 않았다.
custom transform을 통해서 해결
affine transform (matrix image transform)
https://www.youtube.com/watch?v=AheaTd_l5Is
명쾌한 설명 3D = 2D + 2D linear move
지금은 2x3 affine matrix를 이용해서 augmentation
(using)
- x, y scaling
- translation (shifting) (not using)
- shearing
- rotating
_get_border 는 affine matrix로 cropping할때 이미지의 끝부분에 margin을 두어서 안정한 cropping이 되도록 하는 역할이다.
와.. 개판이다 진짜 검토는 사람이 필수다 (validation 해놓고, train으로 돌아오는 코드를 넣지를 않았네 claude)
#
여기서 지금 bbox가 무조건 0, 0, 511, 511로 나오거는 문제
하.. clipping을 어디서 가져온거냐
x1 = max(0, min(x1, self.img_size - 1))
y1 = max(0, min(y1, self.img_size - 1))
x2 = max(0, min(x2, self.img_size - 1))
y2 = max(0, min(y2, self.img_size - 1))
x1 = max(0, x1)
y1 = max(0, y1)
x2 = min(x2, self.img_size)
y2 = min(y2, self.img_size)
- scaling 이슈
base_scale = self.img_size / max(orig_w, orig_h)  # 기본 스케일
random_scale = np.random.uniform(scale_range[0], scale_range[1])  # 랜덤 스케일
s = base_scale * random_scale  # 최종 스케일
정상화
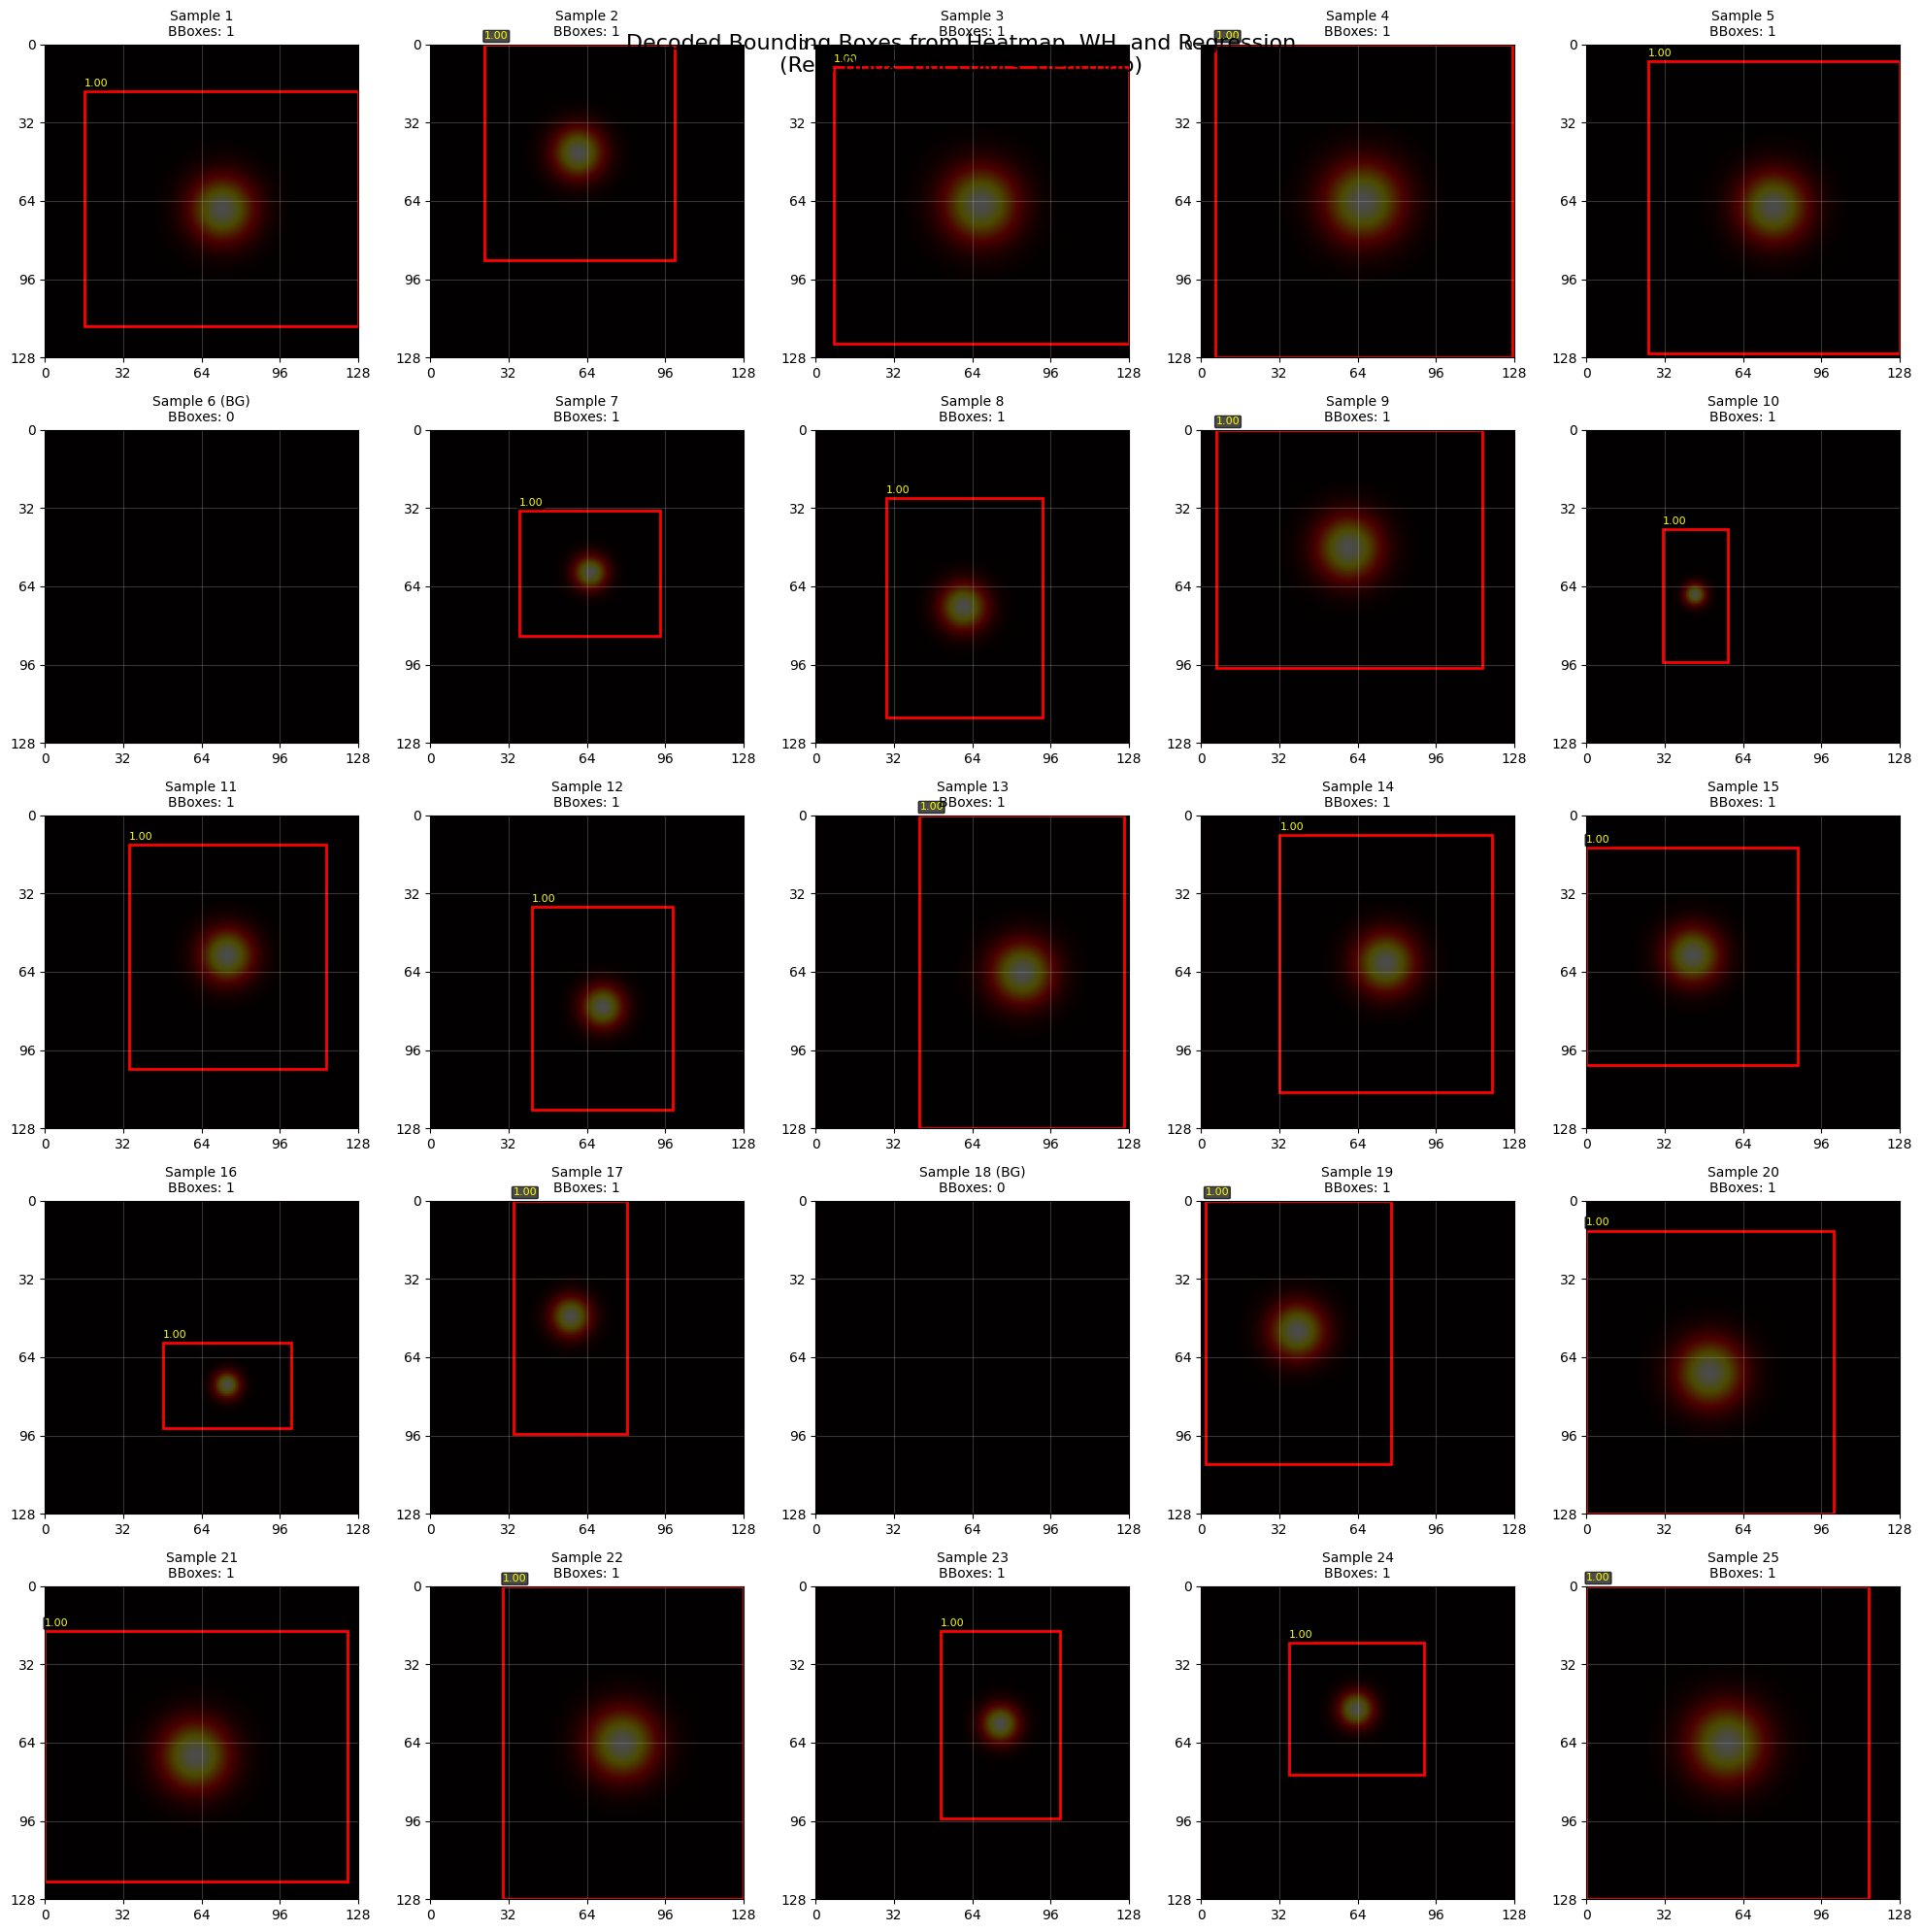
precision recall f1
이것들의 의미가 학습 과정을 통해서 보니까 매우 뚜렷함
precision 100 = 모델이 일단 몇개는 확신을 가질 수 있는 상태가 됨 (가장 먼저 나옴)
recall 90 = 줄건 주더라도 일단 positive는 무조건 잡아냄
f1-score = 짬뽕
first meaningful log => runs/centernet_experiment_20250622_0441
jetson serial
masking을 먼저쓰우고 해당 설정을 or gate로 입력
struct termios tty;
tcgetattr(serial_fd, &tty);
cfsetospeed(&tty, B115200);  // 115200 보드레이트 사용
cfsetispeed(&tty, B115200);
tty.c_cflag &= ~PARENB;
tty.c_cflag &= ~CSTOPB;
tty.c_cflag &= ~CSIZE;
tty.c_cflag |= CS8;
tty.c_cflag &= ~CRTSCTS;
tty.c_cflag |= CREAD | CLOCAL;
tty.c_lflag &= ~(ICANON | ECHO | ECHOE | ISIG);
tty.c_iflag &= ~(IXON | IXOFF | IXANY);
tty.c_oflag &= ~OPOST;
tty.c_cc[VMIN] = 0;
tty.c_cc[VTIME] = 5;
tcsetattr(serial_fd, TCSANOW, &tty);
tty serial 통신 설정들 각 CS8 CSIZE 같은 constant는
/usr/include/bits/termios.h
/usr/include/asm/termbits.h
/usr/include/termios.h
이런곳에 저장된 매크로상수이다
#include <termios.h> 를 통해서 접근 가능
cpp thread
| 구분 | join() | detach() |
|---|---|---|
| 목적 | 결과를 기다림 | 독립적으로 실행 |
| 메인 스레드 | 블록됨 (대기) | 계속 진행 |
| 사용 시점 | 결과가 필요할 때 | 백그라운드 작업 |
| 스레드 관리 | 명시적 동기화 | 자동 관리 |
SIGINT = signal interrupt
Ctrl+C → SIGINT → signal_handler 실행 → 안전한 종료 처리
scheduler dict
에는 milestone도 같이 있음 따라서 새로운 schduler로 하려면 그냥 scheduelr를 선언해서 사용해야돼
105부터 threshold 0.7
아두이노
아두이노는 std::thread 기반의 detach thread 불가
왜냐하면 OS kernel scheduler 가 없기 때문에 thread 작동 불가능
Checkpoint loaded from models/models_real_full/centernet_mb2_epoch_120.pth
Evaluating val loss: 100%|████████████████████████████████████████████████████████████████████████████████████| 24470/24470 [08:43<00:00, 46.75it/s]
============================================================
Validation Loss Results from models/models_real_full/centernet_mb2_epoch_120.pth
Average Total Loss:     0.8366
Average Heatmap Loss:   0.4220
Average Size Loss:      2.3920
Average Offset Loss:    0.1754
============================================================
Possible Improvemenets
- DeepStream Gstreamer Pipeline to process CSI camera in GPU
- Streaming Window with CUDA
- preprocessImage to OpenCV CUDA
- doInference
- KalmanFilter etc -> object detection
opencv CUDA version
Not worked
git clone https://github.com/opencv/opencv.git
git clone https://github.com/opencv/opencv_contrib.git
cd opencv
mkdir build
cd build
cmake -D CMAKE_BUILD_TYPE=RELEASE \
      -D CMAKE_INSTALL_PREFIX=/usr/local \
      -D OPENCV_EXTRA_MODULES_PATH=../../opencv_contrib/modules \
      -D WITH_CUDA=ON \
      -D CUDA_ARCH_BIN="5.3" \   # for jetson Nano
      -D WITH_CUDNN=ON \
      -D OPENCV_DNN_CUDA=ON \
      -D OPENCV_GENERATE_PKGCONFIG=ON ..
make -j$(nproc)
sudo make install
https://whiteknight3672.tistory.com/315
gcc gcc++ mismatches
code analysis
mutex는 변수를 보호하는 게 아니라 코드 블록의 실행을 제어합니다. 여러 스레드가 같은 mutex를 사용하는 코드 블록에 동시에 들어가지 못하게 막는 것뿐입니다.
!!!!!!!!!!!!!!
onnx export 할때 concat했는데, 해당 concat한 wrapper를 eval()로 안하면 본 모델과 다르게 export 되어서 jetson inference가 이상했었음(1시간 쓰,,,)
일단 preprocessing할때도 resize로 찌부시키는 거랑 안하는거랑 inference에서 차이가 낫음
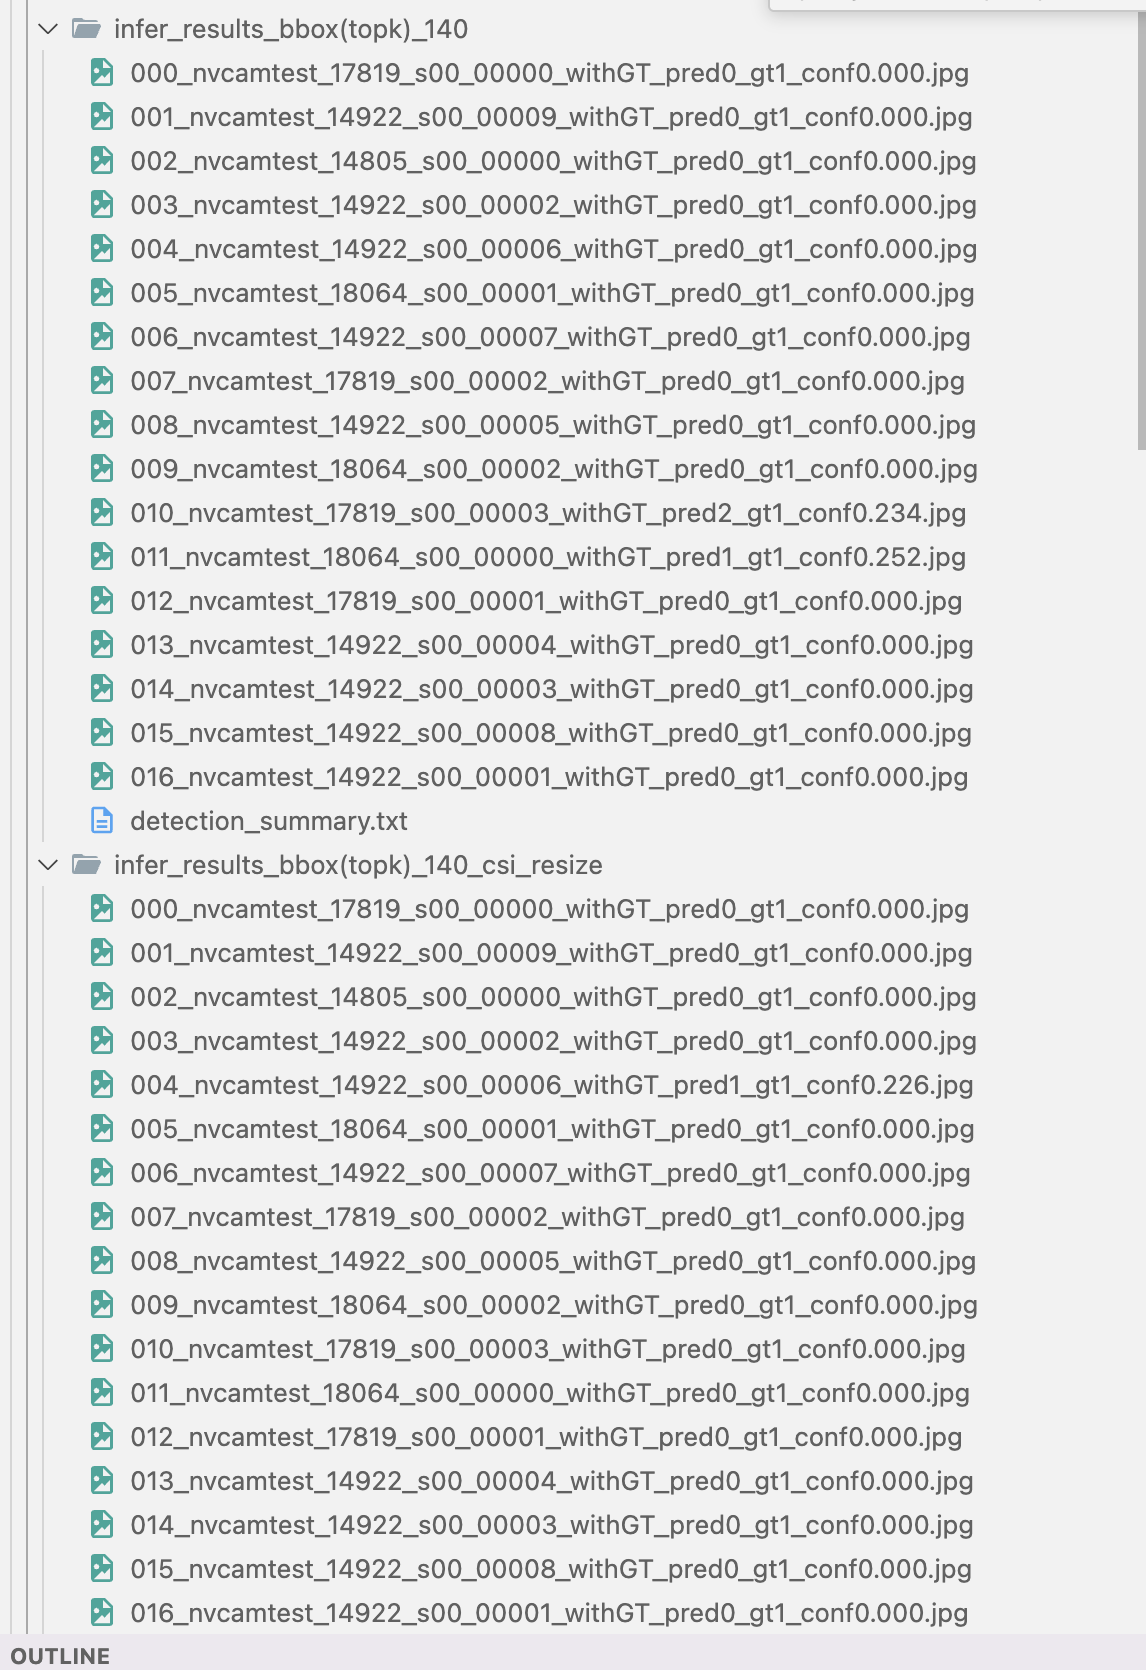
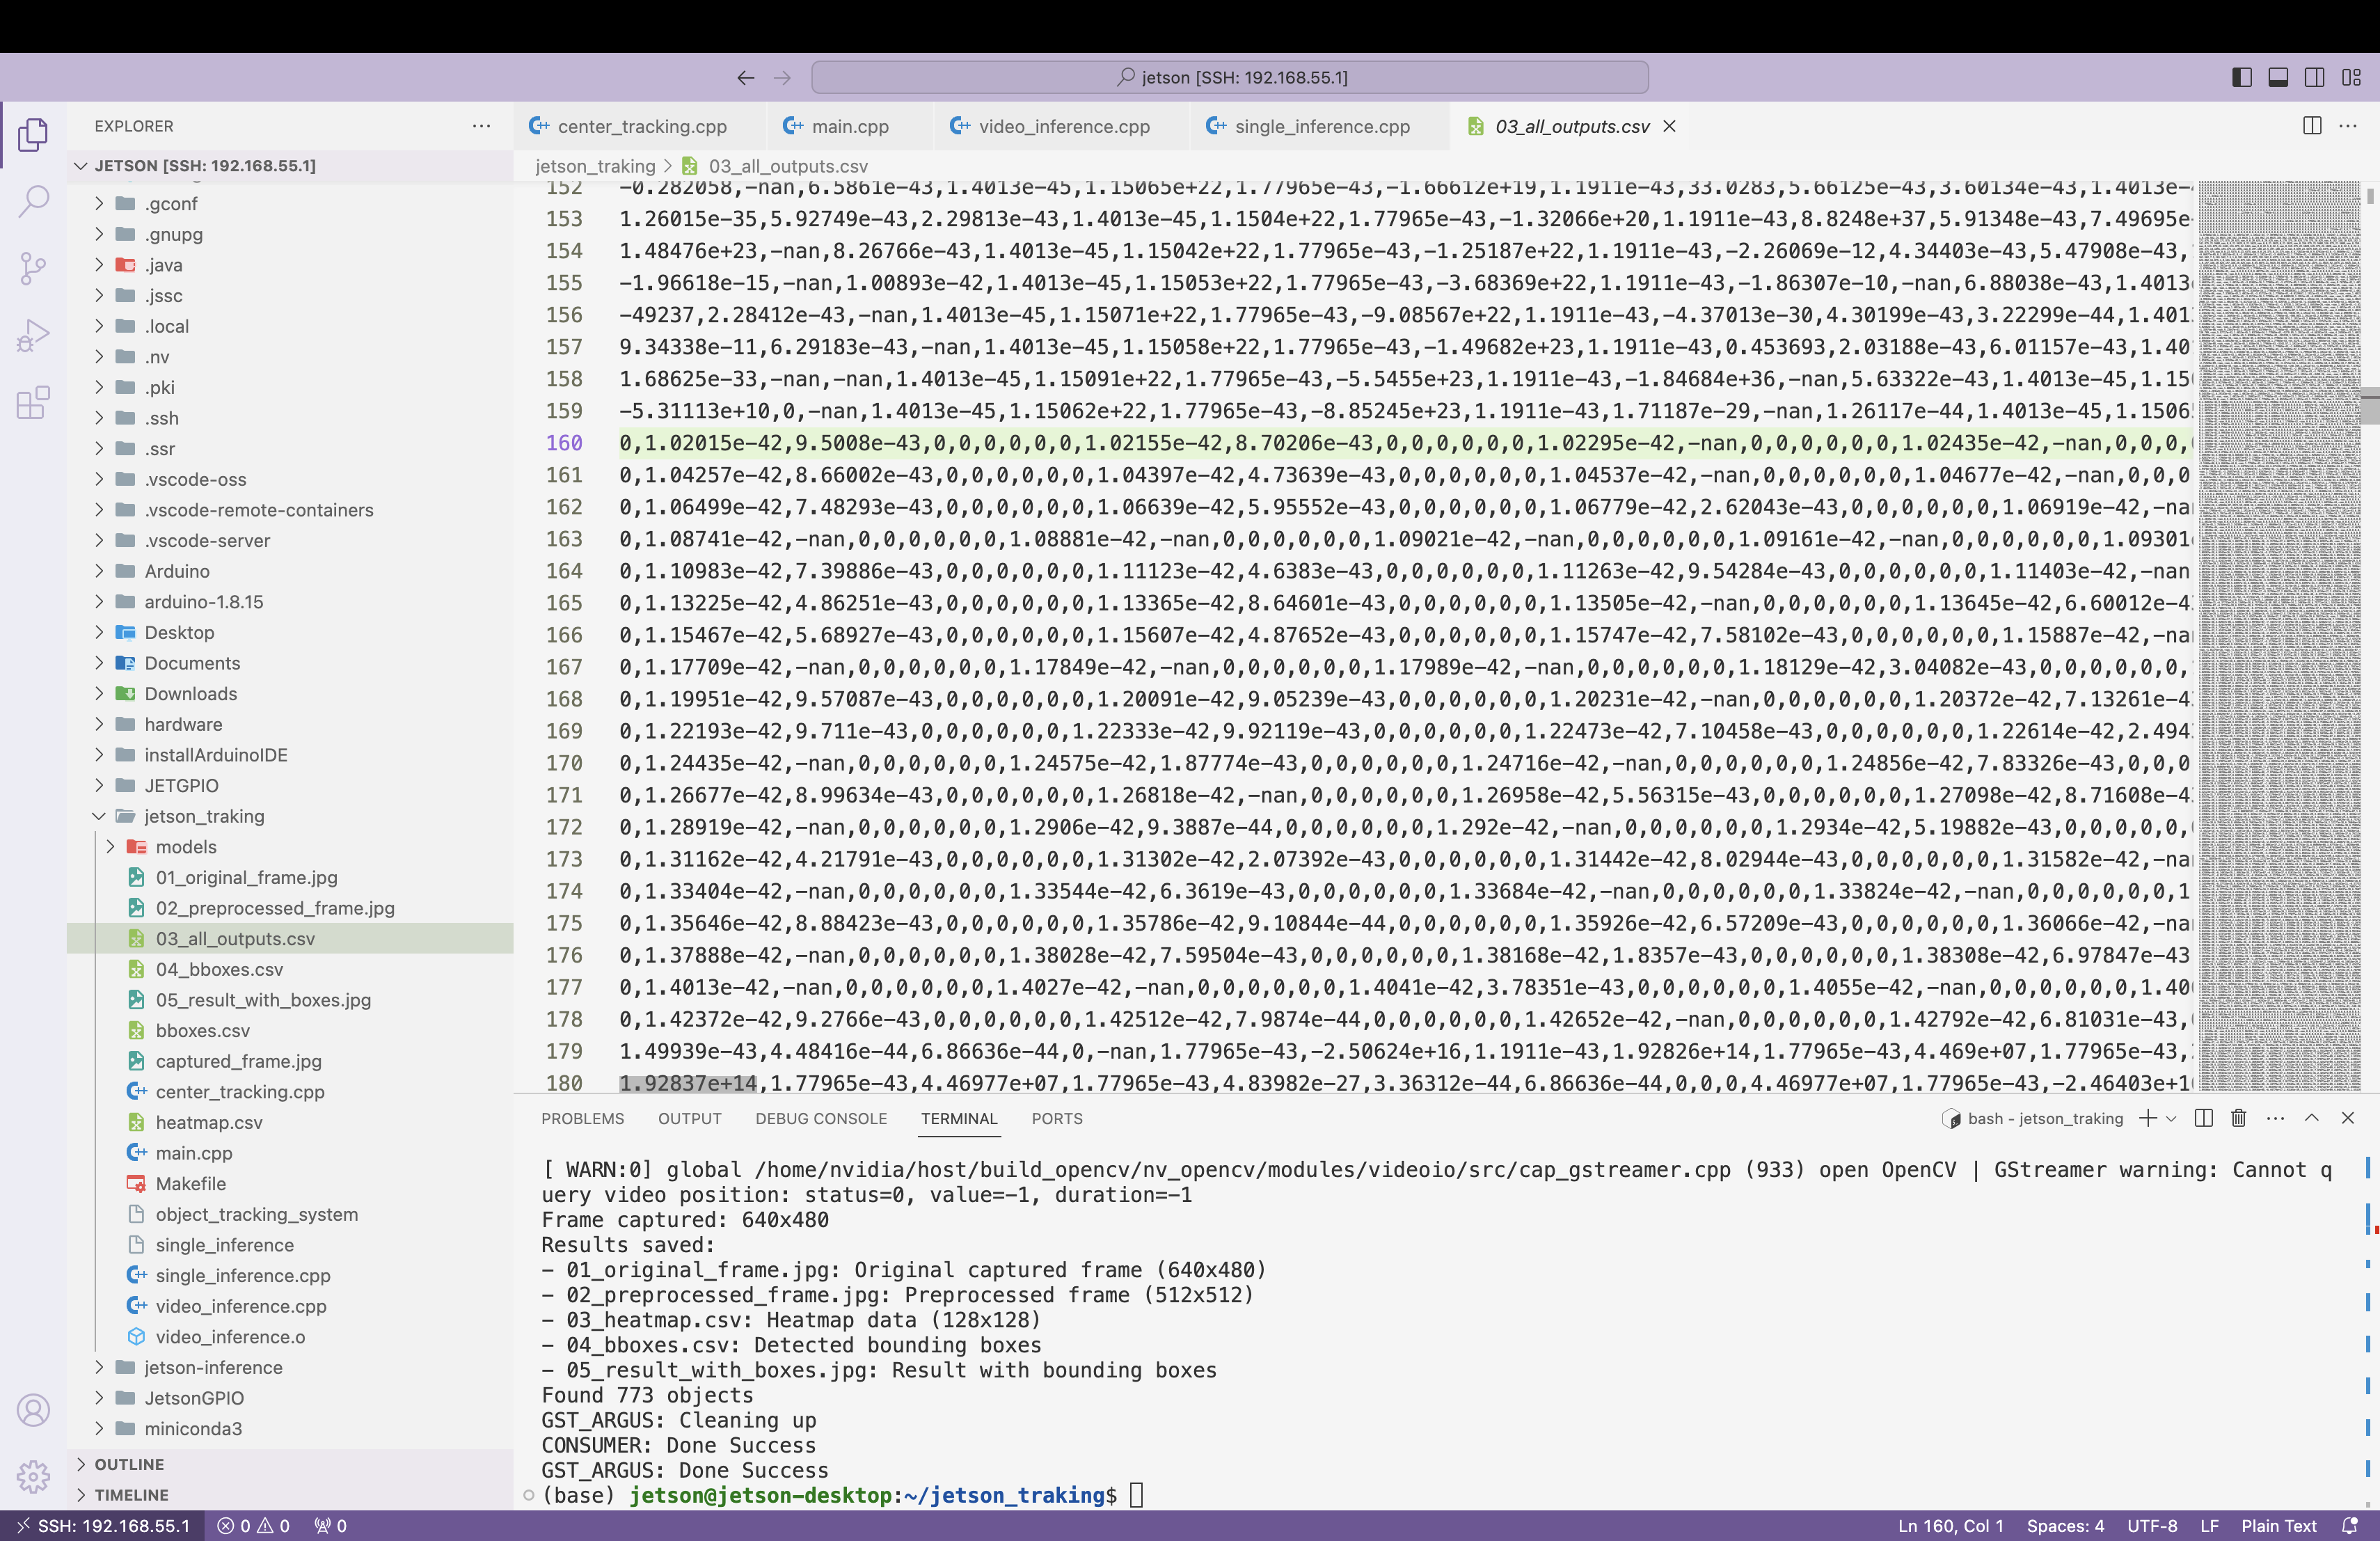
20250624 에서 시도한 것들
- centernet binding을 ouput0에서 hm wh reg로 binding하고 buffer로 넘긴것 (concat시 알수없는 계산값 계속 발생)
- pid제어 부드럽게 하려고 하지만, p를 늘리면 속도는 빠른데 오버슛이 많고, p를 줄이면 느리다
jetson nano <-> arduino
--- Test 4 ---
Signal sent to Arduino...
Response received from Arduino!
Round-trip time: 12.2015 ms

--- Test 5 ---
Signal sent to Arduino...
Response received from Arduino!
Round-trip time: 11.9442 ms

...

--- Test 10 ---
Signal sent to Arduino...
Response received from Arduino!
Round-trip time: 13.3266 ms
Avg. 12.26 ms
#
cudaMemcpy : 0.4ms
sudo apt-get install libgstreamer1.0-dev libgstreamer-plugins-base1.0-dev
sudo apt install deepstream-6.3
TensorRT inference Data flatten
PyTorch → ONNX → TensorRT 변환 시, 출력 텐서 인덱싱은 반드시 CHW 기준으로 계산해야 함
wh[idx * 2] 형태는 TensorRT에서 오작동 가능 → channel * H * W + y * W + x로 수정 필요
Transfer learning
transfer로 흰색 종과 coco dog로 1.4:1 background로 50epoch 30epocc 0.1x scheduling 함.
https://github.com/AastaNV/JEP/blob/master/script/install_opencv4.5.0_Jetpack4.sh
갑자기 면적 폭증은 막아야됨
문제
Frame 흐름 + Action 흐름 예시 (지연 누적됨)
| Time(ms) | Frame | Inference | Command Issued | Actual Actuation |
|---|---|---|---|---|
| 0 | F1 | → inference | ||
| 33 | F2 | → inference | ||
| 66 | F3 | → inference | Action_1 | |
| 99 | F4 | → inference | Action_1 again | Action_1 실행됨 (지연됨) |
| 132 | F5 | → inference | Action_2 | Action_1 반복됨 (밀림) |
| … |
즉, 실제 world는 변하고 있는데 tracking된 object 위치는 이전 frame에 기반한 판단, 그리고 명령은 늦게 실행되면서 모든 게 뒤틀림. 특히 actuator latency와 frame capture → inference latency가 누적되면 아래와 같은 문제가 생김:
- actuator가 움직이기 전의 이미지 기반 판단
- actuator가 움직인 후의 반영이 frame에 늦게 반영됨
- 반복적 오동작 및 헛도는 움직임 발생 (oscillation)
- Jetson:
predict→command (serial)→wait for ACK - Arduino:
serial read→servo move→ACK - Jetson:
on ACK→capture next frame→inference반복
// pseudo-code for Jetson
while (true) {
    if (received_ACK_from_arduino()) {
        frame = capture_frame();
        result = inference(frame);
        command = decision(result);
        send_serial(command);
    }
}
header file의 중요성
- forward declaratoin
- extern 설정 (전역변수)
- cuda code c linkage
- Header Guard
Header defines “What” / CPP defines “How”
Tips : header guard를 사용하면, 동일 header file의 recursive하게 여러번 포함되더라도 컴파일 오류를 발생시키지 않음